Search This Blog

Friday, December 17, 2010

Corner giftcard pockets

First off, I apologize for the long post.

So after I made a handful of Christmas cards for my kids' teachers, I decided I would insert Starbucks giftcards inside.  I bought a bunch of Starbucks giftcards and then.....what, NO little envelopes?  I was a little peeved, momentarily, especially when my barista suggested I can go to any Starbucks and see if I could find the little envelopes they go in - this is AFTER she has already rung up my 10 or so giftcards!  Grrrrr!  But then, I thought....I'll make my own!  However, instead of making little envelopes for each one of the many giftcards I bought I decided to just make pockets to hold the giftcards inside the greeting cards. 

I wanted to make a pocket using corner picture holders for the giftcards.  I looked through all the cartridges I have linked in my Gypsy and couldn't find a corner picture holder to my liking.  Sure some carts had "corner" images to mimic an actual picture corner holder, but I wanted one that can serve as a "pocket" so that the giftcard recipient can easily take it out.  So I made my own!  Love my G (just saying LOL) for this!  I decided to pick out the corner image on the Picturesque cartridge that looks like it could be a doily corner.  Then I clicked on "Shift/Lock" key and chose its coordinating bottom layer.  I then added 2 rectangular images to serve as "flaps" to hold the giftcard in place, and welded those with the bottom image.


After cutting the images on the Cricut (I needed a bunch!), I folded in the flaps on the bottom images.


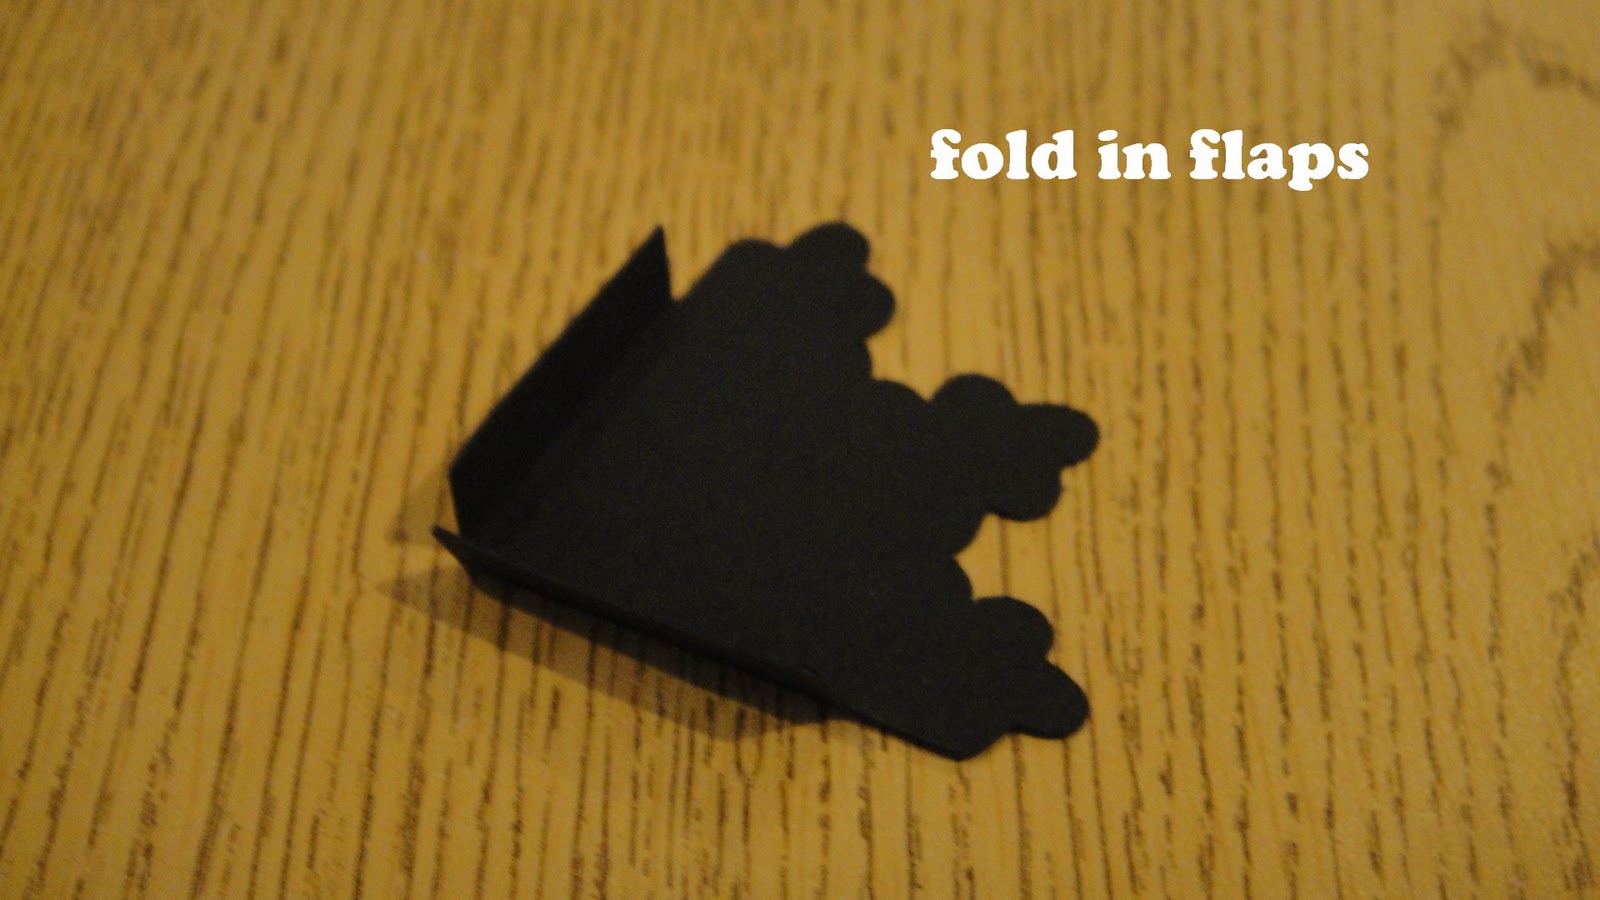
Then I snipped off both corner end flaps at an angle.  This is so that when you fold in the two flaps they're not bulky.


I then attached the top layer.


Then put glue on the back flaps ONLY so no excess glue gets on the giftcard.


Then put your gift card in

Here's what you do next....


There you go!

Thanks for stopping by! 


Thursday, December 16, 2010

Some Christmas cards


OMG Christmas is almost here!  I need another week, please!  Anyway, here are just a couple of cards I was working on this week to give out along with gifts to my kids' school teachers. They are both size A2 cards.  The ribbons were from the $1 section at Target.  Patterned paper is from a DCWV stack I just recently purchased at Michaels.  The snowflake image was from When It's Cold Outside 2009 seasonal cartridge.  The sentiment was from JustRite Stampers cut out using Nesties and colored in with chalk.  The ribbons are blinged with irock gems. 

Thanks for looking!

Monday, December 13, 2010

Cricut Circle Challenge #10


Here is an A2 card I made for the Cricut Circle Challenge #10.  We were asked to make either a tag or a card using Jana Eubank's sketch below:


I couldn't find a ribbon from my stash that was the right color or the right width, so I made my own - quite accidentally LOL!  I took a one inch tall strip of cardstock and double punched it using a Martha Stewart puncher.  I liked the effect, but thought it was missing something, so......

....I threaded a narrow ribbon through and cut half an inch over the length of the
cardstock on both sides.

Here's another one I made using the same puncher but different ribbon and different color cardstock.  I liked how these turned out I might just experiment more with my other punchers! So easy to do - try it! 


Cricut cuts:
*postage stamp image and shadow - Base Camp
*scalloped oval and shadow - Lacy Labels
*"Seasons Greetings" - Martha Steward Seasonal Cake Art
*bells with layer - Wrap it Up

Once again, thanks for stopping by!

Tuesday, December 7, 2010

How do you dough?


My entry for the Cricut Circle Weekly Challenge #10 is a double scrapbook layout.  This week's theme is "Holiday Recipe" and we were asked to

"create a project that is about, includes, or holds a holiday recipe. This could be a scrapbook page, a mini album, a recipe box or book, a Gift for a Neighbor . . . the sky’s the limit. But we want to see you pay tribute to a holiday recipe in some way.
Project must be newly created for this challenge and must include atleast 2 different cuts from any Cricut cartridge to qualify. This challenge is open to Cricut Circle Members only."

My dear sister-in-law is a whiz in the kitchen and loves to bake cookies.  Her favorite is marmalade cookies - strawberries, orange, raspberry, you name it!  I think it's because she was born and raised in London.  I myself love anything chocolate, hence the "chocolate" cookies images, since I couldn't find any "marmalade" cookies images on any of the carts I own.  I suppose I could have made my own - ahhh, next time then!

Some closeups of the cuts


Cricut cuts used:
*title "How do you dough?" - Base Camp (each letter  and question mark embossed with D'vine Swirls CB folder)
*title shadow welded by word - Base Camp
*girl with oven silhoutte and shadow - A Child's Year
*girl and child silhoutte and shadow - A Child's Year
*rolling pin and spoon - A Child's Year
*cookies - Sweet Treats (slightly slanted using the G)


Thanks for looking!


Thursday, December 2, 2010

Recyled Prima Box


I didn't think I was going to be able to play along, but here is my entry for the Cricut Circle Weekly Challenge #9.

We were supposed to incorporate the color black somewhere in our project and recycle or repurpose something, plus use at least 2 different Cricut cuts.

For this project I've decided to use one of my Prima Flowers containers that looks like a pilow box.


 First off I snipped off the plastic part that hangs on the top of the empty pillow box.

Here are the Cricut cuts I used. 


These two cuts were NOT cut using the Cricut.  Just two pieces of scrap I had lying around.  the top one is punched with a Martha Stewart corner punch.


I embossed these two Cricut cuts with the D'vine Swirls CB folder, then inked the sides.


I attached the square cut on the backside to cover the writing on the box.  I then assembled the rest of the tag for the back of the box, which you can see at the top of this post.


To finish off the box and to cover the flower image on the front of the box, I assembled the 3 flower cuts together after crumpling them first to give them some dimension.  I also used foam mounts to adhere each piece together.  I attached a pink button in the middle.


Cricut cuts used:
*tag shape - Just Because
*square - George and Basic Shapes
*3 flower cuts in varying sizes - Picturesque
*rose silhoutte - Picturesque
*"Happy Birthday" silhoutte - Once Upon a Princess

Thanks for looking! 


Tuesday, November 30, 2010

December CC Magazine Contest


Hello once again.  Here is my entry for the Cricut Circle Magazine.  The details for the challenge are as follows:

Contest Rules:
You must create your gift bag or box using a base from one of the many Cricut cartridges available. Embellish it to fit your style! Please use at least 4 Cricut cuts in your design and incorporate something from one of this month’s magazine sponsors. (You can see their ads in the back of the magazine.) Please… only one entry per person. Entry deadline is Friday, December 3rd at 11:59 pm. We will pick a 1st, 2nd and 3rd place winner this month!! 1st place winner will choose from the Wrap It Up, Paper Lace or Quarter Note Cartridges. Then the 2nd place winner will get the next choice and the 3rd place winner will recieve the final cartridge. We hope that is incentive enough to get your creative juices flowing!!

For this challenge I've decided to create a small gift box to put a necklance in.  You can just see the gold chain peeking from the plastic "window" above.  Below is a picture of all the cuts I used to assemble this box.


Cricut cuts used:
* box base (Wrap It Up) welded with 2 scalloped ovals (Straight From the Nest) to make 2 "windows"
* 2 ovals (George and Basic Shapes) cut from old Cricut cart blister pack, then embossed with the Snowflakes CB folder to match the snowflake design on the box
* 2 Picturesqe cart tags welded together to make tag base
*Picturesque tag cut for the front of the tag
*snowflake from Picturesque cart
*tag title from Winter Woodland
*tag title blackout from Winter Woodland

I had to incorporate something from one of this month's Cricut Circle magazine sponsors and I chose to use my Imaginisce irock tool to attach the blue Imaginisce gems onto the snowflake on the tag.  I had fun making this box!  Thanks for stopping by!

Monday, November 29, 2010

Home Sweet Home

My entry for the November Cricut Circle Challenge is a curtain tieback.  This month's theme is "Home Sweet Home" and the details for the challenge are as follows:

NOVEMBER MONTHLY CHALLENGE: HOME SWEET HOME
The theme for this month’s challenge is all about cozying up your home with Handmade Home Decor! Please create a home decor project. Project must be newly created for this challenge and should include the following elements to qualify:
  • Use atleast one Cricut Cartridge Cut
  • Use the Cuttlebug in some way (embossing folder, Cuttlebug die, Quilling kit, etc.)
  • Use Felt in some way
  • Use the color GREEN somewhere on your project
This challenge is open to Cricut Circle Members only.

I made 4 of these tiebacks eventhough I'm only showing one here.  For the base of each of the curtain tiebacks I used a burgundy felt purchased from Michaels cut in 3 in x 12 (really a third of the felt piece).  I then cut the swirly images from the Cindy Loo cart in the green moss felt (already had adhesive backing) at 2" each with the deep cut blade, multicut at 4, speed medium and max pressure on the Expression - BTW I'm NOT looking forward to cutting felt again any time soon :) . As you can see in the picture, I even put masking tape all around the felt before I cut.  


 I then ironed the images onto my base felt.  Then I attahed velcro on the ends.  Velcro had adhesives on them already so all I had to do was cut to size.
Showing the back of the tieback here.


Then I attached a flower I made using one of the quilling sets I bought from cricut.com a couple of weeks ago.  I attached the flower using 3M mounting tape.  And there you go!  Thanks for looking!  

Sunday, November 28, 2010

Thanks, Angel!


Wow!  A blogger award, really?  Angel over at Owlbeescrappin.blogspot.com sent me a very nice surprise this morning!  My first one, yay!  Thanks, Angel!  It means a lot to me that you thought about me.  She is a fellow Circlet and I am so glad I came across her blog.  She is very talented, so hop on over to her blog and make sure you're sitting down because you'll be staring at your screen in awe for a while!

Now, this award does come with some rules so please follow along:
1. Thank and link back to the person who awarded you this
2. Share 8 things about yourself
3. Pay it forward to 8 bloggers that you have recently discovered
4. Contact those bloggers and tell them about their awards
Ok, so 8 things about myself:
1.  I was born and raised in the Philippines and came to California with my family when I was 14 years old.
2.  I have been happily married now for 13 years to my best friend whom I met in junior high but we didn't actually started dating until after highschool (I ASKED him to the prom! - it paid to be forward LOL).
3.  We have two wonderful kids, a boy who's 7 1/2 years old and a girl who's 5 1/2 years old going on 24!
4.  I really need to learn how to speak Hindi or I need to teach my hubby how to speak Tagalog (besides the bad words, LOL!) so that we can talk about our kids without them knowing we're talking about them!
5.  I could probably lose another 5 pounds (ok, that maybe TMI but I'm running out of things to share about me, hehehe!)
6.  I miss my dog dearly, our first born whom we had to put to sleep back in August because of old age - the house really ain't the same without him :(
7.  I'm afraid to use my Imagine because I don't want to run out of ink!
8.  My hubby gets jealous of my Gypsy :)

Ok, now to give the same award to 8 wonderful bloggers I recently discovered - it was very hard to choose because there are many other wonderful blogs I follow that I wish I could list them all here.  And I guess I'm not supposed to send it back to Angel? :(  Oh, well, here goes and I hope you visit these wonderful blogs too!


Monday, November 22, 2010

Double Trouble


Here is my entry for the Cricut Circle Blog Challenge #8.  Here are the details for the challenge:

Weekly Challenge #8: Vintage Elements & a Sketch!
What’s old is new again . . . Vintage Elements are so HOT right now in everything from fashion to home decor, and even right down to our crafting supplies! For this week’s challenge we would like you to use the sketch provided below and create a project with a vintage feeling. We will be watching for soft, muted colors, silhouette images, aged metals, lace trim, doilies, ephemera, fabric, vintage buttons, etc. Please include a minimum of three Vintage Elements on your project.
Project must be newly created for this challenge and must include atleast 2 different cuts from any Cricut cartridge to qualify. This challenge is open to Cricut Circle Members only.


I've decided to kill two birthday LOs in one challenge since I've got tons of pictures to scrap.  It is not a requirement for this challenge to do 2 LOs, however.  I followed Jana Eubank's sketch for the left LO then just did a mirror image of it for the right LO.  When I think of vintage I think of "distressed" and old.  I thought a bunch of black and white pictures would have worked better for me but since I didn't have any, I just "aged" my pictures a little by sanding the edges of my photos.  I also "aged" my tags which served as the mat for the photos by crumpling them first before I chalked and inked.  I also thought tearing the edges of a couple of printed cardstock kinda qualifies for vintage look.


"Aged" photos, edges sanded.


Before picture.


After chalking and inking.  Really wish I had Tim Holtz
distressing inks but I though this was not bad at all!


Torn edges.


Cricut cuts used :
*welded candle borders (Birthday Bash)
*prince (Birthday Cakes)
*princess (Birthday Cakes)
*"lace" (Cindy Loo) cut out of vellum paper
*tags (Gypsy Wanderings)
*title (A Child's Year)

Vintage elements used:
*distressed tags
*lace ribbons
*distressed photos
*distressed/torn-edged paper
*buttons (I didn't have any vintage ones but I sanded them a bit to look "old" LOL!)
*prince silhoutte
*princess silhoutte
*candle border silhoutte
*faux stitching
*half pearls

Once again, thanks for looking and I appreciate you stopping by!

Friday, November 19, 2010

Obsessed With Scrapbooking Giveaways!

So I've heard that Walmart gets more Lites this season.  Joy over at Obsessed with Scrapbooking is giving away some awesome prizes to celebrate Cricut's Hello Thursday releases - come and play!

Wednesday, November 17, 2010

Layered Flowers


Just a quick post.  I couldn't wait until I get my hands on the Cuttlebug Quilling kits I ordered from Cricut.com last week, so I decided to make do with a cricut cart cut for some 3D-look flowers.  Here are my first 2 Christmas cards made entirely from my scrap stash.  The card on the left is 5 x 5 and the one on the right is size A2.  The flower cut was from the Gypsy Wanderings cart cut at varying sizes.  I crumpled the pieces a little before I attached each piece with foam mounts then glued a gem in the middle.  I used the spots and dots and big snowflakes embossing folders for the one on the left card and the swiss dots for the flower on the right side.  The sentiment on both cards are from JustRite stamper, cut out with Nesties.  I also used my irock for attaching the smaller gems on the cards.  I also used MS punches for both cards.  Thanks for looking! 

Tuesday, November 16, 2010

Happy Birthday Card, No Cricut!


My 12 year old niece, bless her heart, thinks I make pretty nice looking cards - so sweet of her, I know since she has no one else to compare my work with LOL!  She had asked me to make her a birthday card for a friend.  So I have leftover paper from the one I cut out to make my card for this week's CC Challenge I've posted yesterday.  I'm been trying to be good at really using up my scraps - they pile up so quickly!  The card is 6 x 6.  No Cricut cut was used for this project.  The flowers are Prima stacked together, button from Michaels and snaps from Making Memories.  Once again I attempted to sew on my card and messed it up, especially the corners, so hence the use of snaps!  I'm either going to give up this sewing feat or continue to use the snaps to hide my boo boos.  I highlighted the two butterflies printed in the paper with stickles.  The sentiment is a JustRite stamper.  Coordinating scalloped papers were cut using Nesties.


I've decorated the inside of the card with coordinating paper punched on one end with a MS punch.  Thanks for looking!

Monday, November 15, 2010

Cricut Circle Challenge #7


Here is my entry to the Cricut Circle Challenge #7.   The details for the challenge are below:

Weekly Challenge #7: Thank You Color Challenge
Cultivating an attitude of gratitude is a great way to enrich our daily lives. This week we would like you to create a THANK YOU card using a minimum of 2 different Cricut Cuts and the color inspiration provided below. Magenta, Apricot, Deep Olive, and Golden Yellow.


I've decided I'd better play with my Cricut Imagine for this challenge since I haven't touched it for a while.  The card is 6 x 6.  The printed background paper is one from a K&Co stack "Best of Brenda Walton".  The flowers are Prima, buttons from Michaels, and snaps (LOL to hide my boo boo in attempting to stitch my card) are Making Memories.  The sentiment is from the JustRite Cardmaking kit set I bought from Glenda (go visit her blog for awesome prices on the JustRite stampers!) cut with petite scalloped Nesties in varying sizes.  The yellow cardstock was embossed with the D'vine Swirls folder on the CB.  The Cricut cuts I used on the card were from the Nursery Tails cart (the racoon and squirrel with the ball, the butterfly, the two dragonflies and the fern and cattails) and the envelope was cut using a paper from the same K&Co stack but this time I used the Sweethearts cart.

Here's the inside of the card with the sentiment from Joyful Hearts Set, another JustRite stamper and decorated with coordinating paper.


Thanks for looking!  

Friday, November 12, 2010

Cricut Circle Magazine Challenge


Well, I wasn't going to play along because I didn't know what to make.....but see I have all these plastic casings from all the carts I have been amassing since purchasing the Gypsy a year ago.....

See what I mean?  I'm a pack rat too and don't like to throw anything away.  I have a box under my workstation with empty ribbon and empty ATG spools but I'm not going to bore you guys by showing it here :)  So here are the details for the Cricut Magazine challenge over at the Cricut Circle Blog:

MAGAZINE ORNAMENT CHALLENGE!
We want to see the beautiful creations you can make with the Cricut, YuDu or Cuttlebug for your Christmas Tree.
Create something that is unique and wonderful, then share it for all to enjoy!
Contest Rules:
Project must be newly created and able to hang from your tree. You must use at least 4 Cricut cuts in your design and incorporate something from one other Provo Craft Product… like the YuDu, Cuttlebug or Knifty Knitter.

The ornament I've decided to make was super easy and cut from the Holiday Cakes cart.  I set my images at 5 inches tall.  I know this may seem like huge, but I have a 12 ft tall artificial Christmas tree that it's going to hang to once the hubby gets around to bringing all the boxes down from the attic.  The 2 green scalloped circles were unaltered and the red scalloped circle was cut with the inside designs hidden using the hide contour on the Gypsy.  The plain circle (plastic casing) was cut slightly bigger than the openning on the other 3 scalloped circles because I wanted it to show through the middle without falling off - it was also cut using the  multicut function on the expression.  Here is the pic after I have cut the images and the plastic circle already embossed with the Cuttlebug Large Snowflakes folder (one of the ones from the HSN bundle).


I attached the red image behind one of the green images then attached the embossed plastic circle behind them.  I attached a piece of red thin ribbon to hold the ornament before I sealed the back with the remaining green image.  I had to bling (not a requirement here, but just a ME thing) with my irock and gems and a red tulle for the bow.  LOL my kids actually thought that the embossed plastic was a piece of glass!  Not that you guys had a choice ;), but thanks for letting me ramble on and thanks for stopping by!