Search This Blog

Showing posts with label MS All Occasions Cake Art. Show all posts

Wednesday, September 21, 2011

E2 HSN Launch Banner Entry #2 - Ornament Banner


Hello there again!  Today I'm sharing my second banner for the E2 HSN Launch banner contest.  For the details of the contest, please see my post yesterday, below this one.  I call this banner my Ornament Banner but my 6 year old really wants to call it the Jingle Banner because, well....each piece actually jingles when you shake it LOL because of the little bells attached to it - but I will get to that later.

The base for each piece came from the ornament image from the exclusive CTMH Art Philosophy cart.  I used hide contour on my G to hide the cuts on the upper part of the top layer because I knew that part was going to be covered by the ribbon anyway.  The bottom layer was cut once in printed cardstock and the other cut in plain light blue cardstock, just so I can have  thicker pennat pieces to work with. 


I also attached a small piece of craft plastic in between the two bottom layers to make them stronger and not tear when I finally hang them.  For this plastic piece I offset the image in my G so that only the top parts of the ornaments get cut.


After attaching the piece of clear plastic to the light blue layer, I attached the printed layer over, again for added strenght so that the paper won't tear when attached to the banner. 

I used the the font from the MS All Occasions Cake Art cart to spell out "Cricut".  Each letter has 3 shadow layers under the top layer to give it more dimension.   I used foam mounts in between.   Then I attached half pearls to embellish the letters. 


The top ornament layer is embellished with some irock gems, different color for each pennant piece.  I inserted a piece of gold shimmery cardstock to show through the bottom part of the ornament top layer, then I attached a 3D flower from the CTMH Art Philosophy cart.  There's also a craft pearl in each 3D flower.
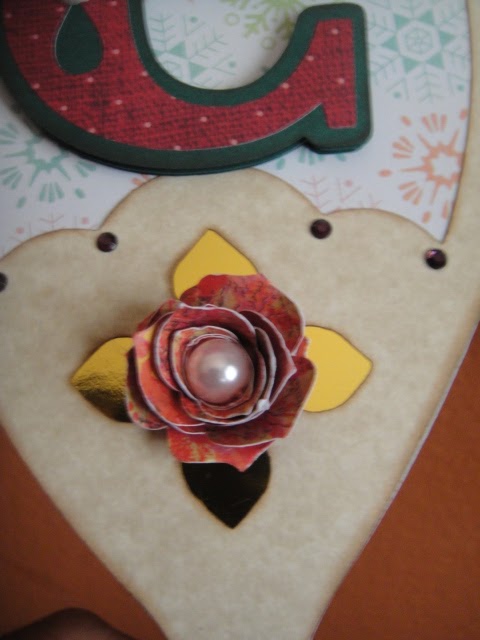
For the top of the ornament, I tied a wired ribbon.  And since I can't really make a decent bow half the time I knew I needed to cover up the middle part LOL! 
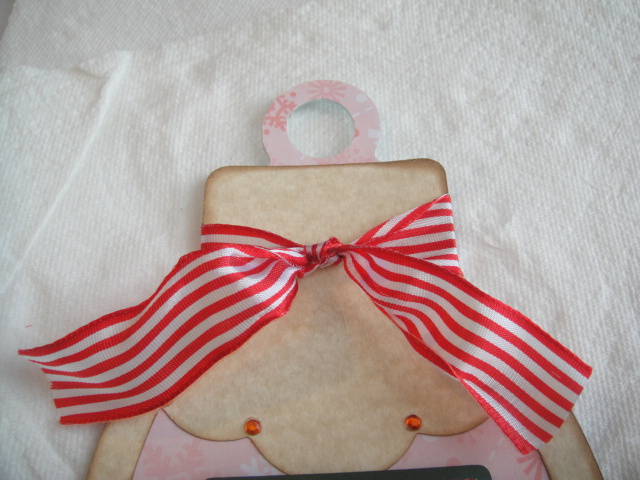
I just tied a knot instead of killing myself trying to make a pretty bow ;)

To cover up the ribbon knot, I used a snowflake image from the MS All Occasions Cake Art (used hide contour for the center of the image).  I used a white glittered paper for this cut.  I then poked a hole in the center using a Cricut tool (the one that looks like a dental scraper). 

Then I threaded 3 small bells using jute twine and threaded that through the hole in the snowflake image. I tied the back of the snowflake in the front of the ugly ribbon knot. 

There you go - it nicely covered up the ugly ribbon knot, don't you think?  Plus each pennant jingles when you shake it ;).   I finished off each pennant piece with a red tulle to hold it in place.  And I almost forgot to mention that I inked each top layer for added dimension. 

Here's another shout out of one of the pennants. 
Thanks for stopping by and again, good luck to all who have sent in their banners! 
 I actually had fun doing the banners, win or lose.  I've also seen some very wonderful banner creations from fellow bloggers and all over the Cricut MBs - sooooo excited! 
 I would hate to be the one judging each banner as they are all so stunning!

"See" you all next time - happy crafting! 

Monday, September 19, 2011

Using My Stash - Happy Birthday Cupcake


Hello there!  So I'm participating in "Using My Stash - Round 2" over at the Cricut Circle MB organized by MamaC.  The rules are that we were to use what we already have until November 1st - no impulse buying!  I sure hope I last that long LOL!  There were some guidelines in her original post in the Cricut MB that I thought I could find loopholes in.....but shhhh don't tell MamaC, ok?  I WAS going to start AFTER the HSN launch of the E2 next week but maybe I can have a pass on that day instead ;). 

My 6 year old daughter's friend from her taekwondo class turns 8 at the end of this week so I made this card to go along with her gift we gave her yesterday.  The base of the card is from the Elegant Edges cart welded together.  Then I cut the same image twice in different colors, using the hide contour feature on my G for the blue layer but not on the green layer.  The green layer was then embossed with the Plum Blossom CB folder.  The circle printed cardstock was cut using the George and Basic Shapes.  The cupcake and the "Happy Birthday" sentiment was from the MS All Occasions Cake Art cart.  I got lucky I found the matching ribbon from my stash - bought it from Target a while back and it came in a spool with 3 other colors for $1!  I finished the card with 3 flower buttons I bought from Michaels a while back too.   The envelope was cut using the Sweethearts cart.

And there you go for my first project for "Using My Stash - Round 2!"  Thanks for looking! 

Friday, September 9, 2011

Butterfly Bday Card


Hello again!  Ok, I promised myself that I will try to make at least one post a week as I am slowly getting my crafting mojo back. Here is a quick post to share a card I made for my SIL Rita who had a birthday a few days ago.  This card fit in an A2 size envelope.  The base card is achieved by welding 2 of the same image from Elegant Edges cart.  Then I took the same image and cut it 2x in two different sizes to create a background mat.  The butterfly was cut in two layers and are from the Martha Stewart All Occasions Cake Art cart with the bottom layer embossed with D'vine Swirls CB folder.  I then added the light pink half pearls along the body of the butterfly.  The sentiment was also from the same MS cart. 

Thanks for looking and have a wonderful weekend!