Search This Blog

Tuesday, January 4, 2011

Cricut Circle Challenge #14

Kids are back to school so I had time to play with my Cricut today.  For this week's Cricut Circle Challenge, the details are as follows:

Weekly Challenge #14: Getting In Shape!

According to polls, “getting in shape” is among the Top Ten Resolutions people make each New Year’s Eve. Let’s do it! Let’s start the New Year off right by getting in shape . . . a shape other than a rectangle. We challenge you to create a project in a shape other than a square or rectangle. Your project must also include a number somewhere and bling of some kind (to go along with this week’s theme of “Blinging in the New Year”!

One of my little niece's birthday is coming up in about a week and a half so I decided to make a card now since I have the time and she so loves Hello Kitty and purple (just like my daughter)!  I have had the Hello Kitty Greetings and Hello Kitty Font cartridges for maybe almost a year and a half now and have never really attempted to use either one, except maybe for the font.  The card I made ended up being 5.56 tall (yeah, that was kind of weird sizing but that's how it ended up since I wanted everything to fit in a 12 x 12 mat on my G).  I used the Hello Kitty Greetings cart for the card function along with its layers.  I found that the best way (for me at least) to assemble this card was to also cut out the silhouette feature along with the blackout feature for the base of the image.  This way you can kind of see where all the little pieces should fall in after cutting.  Hope the picture below shows what I'm talking about. The blackout and the silhouette cuts are both cut in black cardstock so it may be hard to see, but believe me it makes it so much more easier to piece cuts together.


The top part of the umbrella, the bow and the boots were run through the CB with the Plum Blossoms folder.  Then I added some irock gems on the bow (purple) and the umbrella (crystal).  Since my niece is turning 7, I cut out the number 7 using the tag feature from the Disney Mickey Font Cart, cut and layered at 1".  I had some old beads lying around so I threaded some through a strand of the jewelry wire I bought recently and hung the assembled tag to the card.

And here is the inside of the card with the sentiment stamped on and some faux stitching. 

Later this week I will attempt to make the envelope for this card.  Thanks for looking!

Monday, January 3, 2011

Wobble Envy


Happy New Year and happy Monday!  No contest entries for me these past two weeks but I did get some crafting done.  Made my first homemade wobble card - so happy with the result!  I saw a video a few weeks ago made by Linda Kaiser over at http://paperboutique.blogspot.com/2010/12/using-action-wobble-springs-to-add.html (direct link to her blogpost on making homemade wobble card) and wanted to try it so bad!  I was over at a local Joann's Fabric and Craft store last week to grab me some clearanced Christmas paper ($5.99 for a 180 page stack of 12x12 is awwwwwesome! - will save it for next Christmas!) and remembered to grab me some jewelry thin gauge wires. The spool I bought was 28 gauge.  I also got to play with my Imagine for a bit since it's getting neglected.  The card is sized A2. The teacup and the sentiment images are both from the Better Together Imagine cart.  The background paper was embossed with the Plum Blossoms CB folder (part of Asian Bundle), the thin brown cardstock on the side was punched with one of Martha Stewart punchers and blinged with blue irock gems.  I didn't have a plain circle puncher as Linda used in her project so I just cut out two small square pieces of white cardstock from my scrap as you can see below:


This was so much fun to make and I highly recommend anyone to try this - I know I will be making more since the spool of jewelry wire I bought was 40 yards - LOL!  I was literally giddy after I made this card (yeah, it doesn't take much these days to make me happy) everytime I wiggled the teacup image - so cute! Thanks for looking and happy crafting!

Friday, December 17, 2010

Corner giftcard pockets

First off, I apologize for the long post.

So after I made a handful of Christmas cards for my kids' teachers, I decided I would insert Starbucks giftcards inside.  I bought a bunch of Starbucks giftcards and then.....what, NO little envelopes?  I was a little peeved, momentarily, especially when my barista suggested I can go to any Starbucks and see if I could find the little envelopes they go in - this is AFTER she has already rung up my 10 or so giftcards!  Grrrrr!  But then, I thought....I'll make my own!  However, instead of making little envelopes for each one of the many giftcards I bought I decided to just make pockets to hold the giftcards inside the greeting cards. 

I wanted to make a pocket using corner picture holders for the giftcards.  I looked through all the cartridges I have linked in my Gypsy and couldn't find a corner picture holder to my liking.  Sure some carts had "corner" images to mimic an actual picture corner holder, but I wanted one that can serve as a "pocket" so that the giftcard recipient can easily take it out.  So I made my own!  Love my G (just saying LOL) for this!  I decided to pick out the corner image on the Picturesque cartridge that looks like it could be a doily corner.  Then I clicked on "Shift/Lock" key and chose its coordinating bottom layer.  I then added 2 rectangular images to serve as "flaps" to hold the giftcard in place, and welded those with the bottom image.


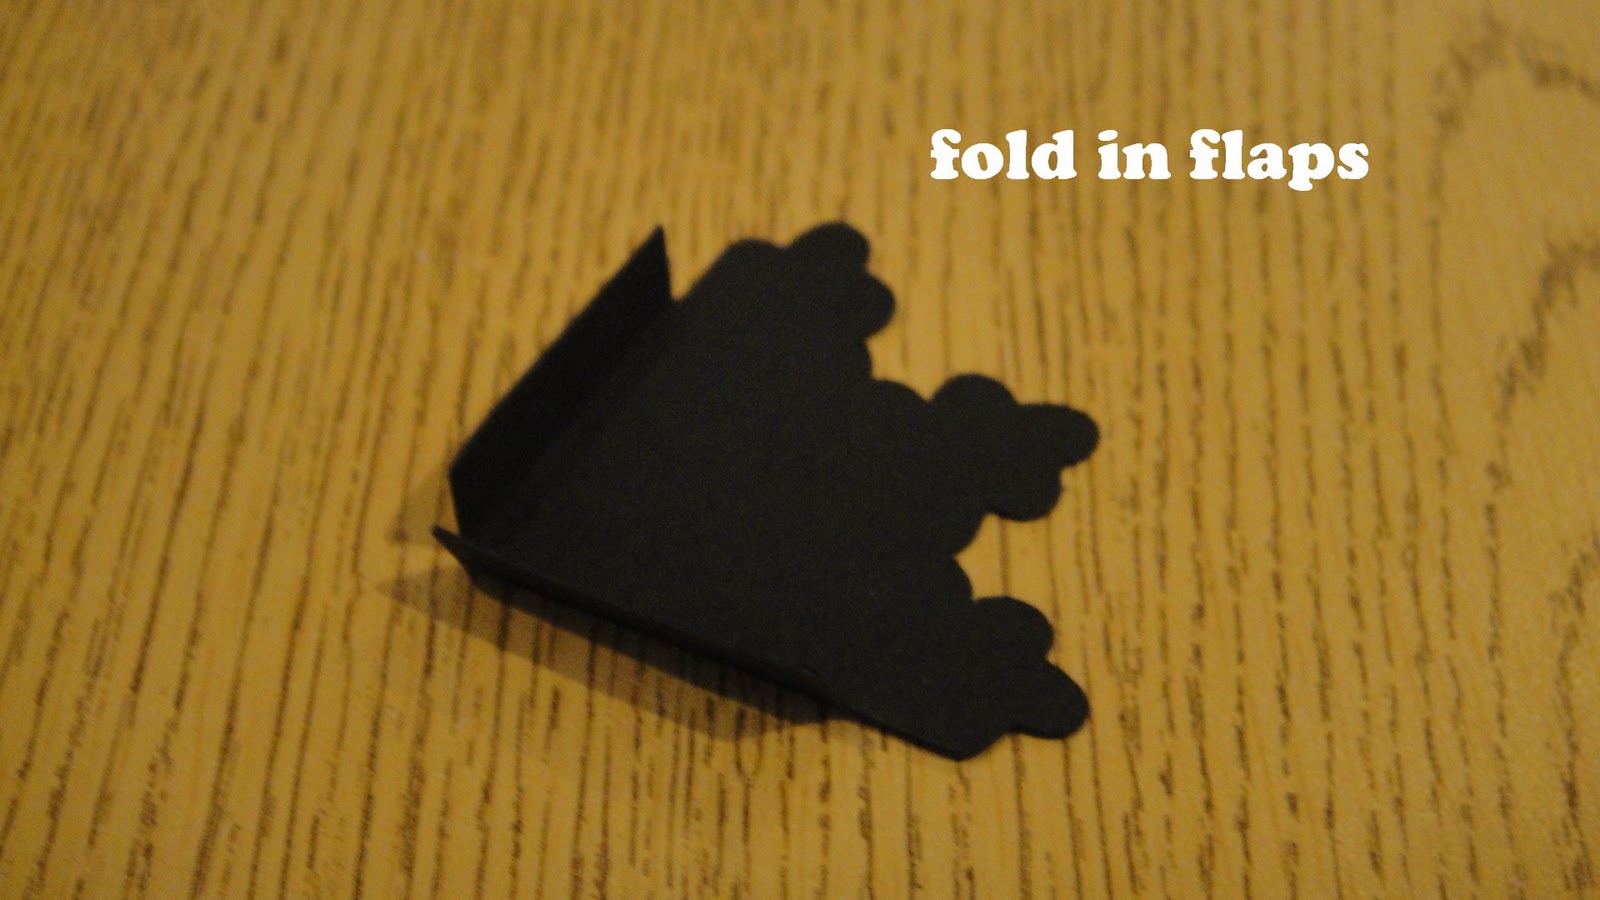
After cutting the images on the Cricut (I needed a bunch!), I folded in the flaps on the bottom images.


Then I snipped off both corner end flaps at an angle.  This is so that when you fold in the two flaps they're not bulky.


I then attached the top layer.


Then put glue on the back flaps ONLY so no excess glue gets on the giftcard.


Then put your gift card in

Here's what you do next....


There you go!

Thanks for stopping by! 


Thursday, December 16, 2010

Some Christmas cards


OMG Christmas is almost here!  I need another week, please!  Anyway, here are just a couple of cards I was working on this week to give out along with gifts to my kids' school teachers. They are both size A2 cards.  The ribbons were from the $1 section at Target.  Patterned paper is from a DCWV stack I just recently purchased at Michaels.  The snowflake image was from When It's Cold Outside 2009 seasonal cartridge.  The sentiment was from JustRite Stampers cut out using Nesties and colored in with chalk.  The ribbons are blinged with irock gems. 

Thanks for looking!

Monday, December 13, 2010

Cricut Circle Challenge #10


Here is an A2 card I made for the Cricut Circle Challenge #10.  We were asked to make either a tag or a card using Jana Eubank's sketch below:


I couldn't find a ribbon from my stash that was the right color or the right width, so I made my own - quite accidentally LOL!  I took a one inch tall strip of cardstock and double punched it using a Martha Stewart puncher.  I liked the effect, but thought it was missing something, so......

....I threaded a narrow ribbon through and cut half an inch over the length of the
cardstock on both sides.

Here's another one I made using the same puncher but different ribbon and different color cardstock.  I liked how these turned out I might just experiment more with my other punchers! So easy to do - try it! 


Cricut cuts:
*postage stamp image and shadow - Base Camp
*scalloped oval and shadow - Lacy Labels
*"Seasons Greetings" - Martha Steward Seasonal Cake Art
*bells with layer - Wrap it Up

Once again, thanks for stopping by!

Tuesday, December 7, 2010

How do you dough?


My entry for the Cricut Circle Weekly Challenge #10 is a double scrapbook layout.  This week's theme is "Holiday Recipe" and we were asked to

"create a project that is about, includes, or holds a holiday recipe. This could be a scrapbook page, a mini album, a recipe box or book, a Gift for a Neighbor . . . the sky’s the limit. But we want to see you pay tribute to a holiday recipe in some way.
Project must be newly created for this challenge and must include atleast 2 different cuts from any Cricut cartridge to qualify. This challenge is open to Cricut Circle Members only."

My dear sister-in-law is a whiz in the kitchen and loves to bake cookies.  Her favorite is marmalade cookies - strawberries, orange, raspberry, you name it!  I think it's because she was born and raised in London.  I myself love anything chocolate, hence the "chocolate" cookies images, since I couldn't find any "marmalade" cookies images on any of the carts I own.  I suppose I could have made my own - ahhh, next time then!

Some closeups of the cuts


Cricut cuts used:
*title "How do you dough?" - Base Camp (each letter  and question mark embossed with D'vine Swirls CB folder)
*title shadow welded by word - Base Camp
*girl with oven silhoutte and shadow - A Child's Year
*girl and child silhoutte and shadow - A Child's Year
*rolling pin and spoon - A Child's Year
*cookies - Sweet Treats (slightly slanted using the G)


Thanks for looking!


Thursday, December 2, 2010

Recyled Prima Box


I didn't think I was going to be able to play along, but here is my entry for the Cricut Circle Weekly Challenge #9.

We were supposed to incorporate the color black somewhere in our project and recycle or repurpose something, plus use at least 2 different Cricut cuts.

For this project I've decided to use one of my Prima Flowers containers that looks like a pilow box.


 First off I snipped off the plastic part that hangs on the top of the empty pillow box.

Here are the Cricut cuts I used. 


These two cuts were NOT cut using the Cricut.  Just two pieces of scrap I had lying around.  the top one is punched with a Martha Stewart corner punch.


I embossed these two Cricut cuts with the D'vine Swirls CB folder, then inked the sides.


I attached the square cut on the backside to cover the writing on the box.  I then assembled the rest of the tag for the back of the box, which you can see at the top of this post.


To finish off the box and to cover the flower image on the front of the box, I assembled the 3 flower cuts together after crumpling them first to give them some dimension.  I also used foam mounts to adhere each piece together.  I attached a pink button in the middle.


Cricut cuts used:
*tag shape - Just Because
*square - George and Basic Shapes
*3 flower cuts in varying sizes - Picturesque
*rose silhoutte - Picturesque
*"Happy Birthday" silhoutte - Once Upon a Princess

Thanks for looking!